
commercetools Shopify Importer Help
The commercetools Shopify Importer works by querying data from the commercetools API, running through the mapping configuration to convert it to the Shopify format, and then sending it to Shopify using their GraphQL Admin API. This is done efficiently using Shopify bulk operations, so the importer can handle large amounts of data.
Both Products and Collections are updated if they already exist. This is determined using a metafield called commercetools-id.
Getting Started
When you first install the Shopify app, a setup process will guide you through getting started:

The commercetools API Client details are required so the importer can use the commercetools APIs to get the products and categories to import.
The mapping configurations determine how data is mapped from commercetools to Shopify.
The currency and locale settings determine the values to use when getting data from commercetools. E.g. to map the product name you need the locale because this is a localised string in commercetools, but you need a single string value in the Shopify API.
See the sections below for more help on how the importer works.
Products
The commercetools products API is used to get products. At present, just the published product data is available. The source object used is based on the Product object, but only with the masterData.current data. The following fields are available as the source for mapping rules:
- All
Productfields apart frommasterData - All fields from
masterData.current(e.g.name,categories,descriptionetc) allVariants- this combines themasterVariantobject andvariantsarray into a single array for easier mappingpublished- frommasterData.publishedhasStagedChanges- frommasterData.hasStagedChanges
The productSet mutation is used to create/update products, so the Shopify fields to map to are ProductSetInput.
Inventory
If you choose a Shopify inventory location when starting an import, this makes the location available to the mapping. If the inventory value is mapped to the inventoryQuantities field on variants in Shopify (as per the default mapping when you create a product mapping) then inventory will be imported into Shopify. Only 1 inventory location is supported per-import at present.
Note, when updating an existing variant, only existing locations will have their inventory updated. New locations won't be added by the Shopify API. So if you have previously done an import without an inventory location, subsequent imports will not be able to set inventory on products. See inventoryQuantities for more details.
Product Options
Mapping to product options in Shopify is one of the more complex aspects of mapping products. Options have to be unique across a product and there is a maximum of 3 options per product.
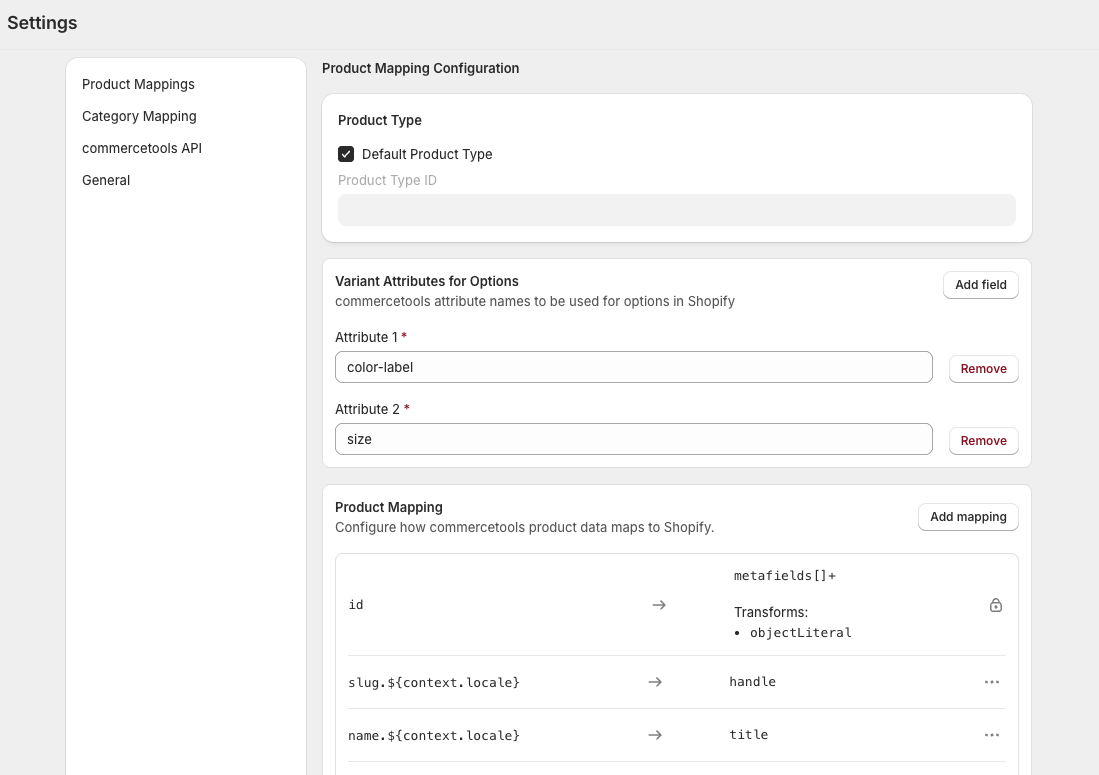
The attributes in the Variant Attributes for Options section on the Product Mapping configuration page are used by the Build Product Options and Build Variant Option Values transforms.
The Build Product Options transform sets the options on the product using the productOptions field.
The Build Variant Option Values transform sets the optionValues field on each variant.
Categories
The commercetools categories API is used to get categories. The Category object is used as the source for the category mapping.
The collectionCreate and collectionUpdate mutations are used to create/update collections in Shopify. These both use the CollectionInput input object, so these are the fields that can be used as the mapping destinations.
Products in Collections
You can choose to import products from commercetools categories into Shopify collections when you start an import.
The product-projections/search API is used to get the products for the categories. Note, this requires the Product Projection Search API to be enabled in your commercetools project.
For products to be imported into the created Shopify collections, they first need to have been imported using this tool. This is because the mapping between the commercetools product ID and Shopify ID is stored in our database to efficiently match products.
Mapping
The mapping system transforms commercetools data into Shopify data using declarative rules. Each rule has a source, a destination, and optional transforms.
A mapping syntax is used to provide a flexible way to map data. The syntax options available are below.
- Dot notation for nested fields (e.g.
name.en-GB) ${}syntax for accessing variables (e.g.${context.locale}). See below for more details on available variables.[]for handling arrays. See Array Mapping Examples below for examples.
The default rules created when you create a mapping configuration are a good example of how to use the mapping syntax.
Below is an example screenshot of a default product mapping configuration.
Array Mapping Examples
- Map all elements in an array:
categories[].id - Map a specific index of an element in an array:
categories[0].id - Append to an array (destination only):
metafields[]+
Products
Mapping configuration can be set per commercetools product type. There is a default mapping configuration that is used if there is no specific mapping for a product type.
When you create a new mapping, it is pre-populated with some default rules to make it easier to get started.
You can also create another mapping configuration based on an existing one by using the Copy option on the Product Mappings page.
Variants
commercetools attribute names can be used to map to Shopify options. E.g. if you have an attribute called material in commercetools and you add that as a Variant Attributes for Options in the mapping configuration, then an option will be created in the Shopify product for that attribute.
See the Products section above for details on the fields that can be used as source and destination.
Variables
Variables use a ${...} syntax. They can be used in both source and destination fields, as well as in transforms. The available variables are:
All Fields
context.locale- The configured locale (e.g.en-GB)context.currencyCode- The configured currency code (e.g.GBP)
Variant mappings:
context.inventoryLocationId- The selected Shopify inventory location ID
Source path:
$root- References the entire source object instead of a nested path
Inside transforms:
value- The current value being processed in the transform pipelinevalue.<field>- Access a field on the current value (e.g.value.url)
Transforms
Transforms are applied sequentially to the source value before writing to the destination.
Below are the available transforms that can be used in mapping rules.
Generic
- Stringify - Converts the value to a JSON string.
- Object Literal - Creates a new object from a template. Use
${value}to insert the current value. - Map - Iterates over an array. Use
params.pathto extract a field from each item, or use Item Transforms to apply transforms to each item. Use the Flatten option to flatten nested arrays. - Require Fields - Validates all
params.fieldsare present. If any is missing, the mapping is skipped. - First - Gets the first element of an array.
- Find Matching Entry - Finds the first array item where
params.matchPathequalsparams.valueToMatch(case-insensitive). - Get Value At Path - Extracts a nested value using
params.path(dot notation).
Product Specific
- Build Product Options - Builds Shopify product options from variant attributes for options. Use with source
allVariants. This uses the "Variant Attributes for Options" attributes
Variant Specific
- Get Variant Price - Extracts the price matching the configured currency and converts from cents to decimal. Use with source
$root. - Build Variant Option Values - Builds option values for a single variant. Use with source
$root. This uses the "Variant Attributes for Options" attributes
Starting an Import
There are a number of options to choose when starting an import. Below is a screenshot of the start import page.

You can choose to import a limited number of products or categories. This is useful for testing your mapping configuration before doing a full import.
Note, when using the free version (which can only be used in a Dev store) you have to specify specific IDs and cannot do full imports. Also, you must only have up to 25 products in your dev store. This is to allow you to test the import functionality, but without being able to do a full import.
Products
You can choose to include an inventory location. This makes an inventoryLocationId variable available to use in your variant mapping rules (see above).
The Publish Imported Products option will publish products to the Online Store sales channel.
Categories
The Import Products into Collections option will import products from commercetools categories into the created Shopify collections. See the Categories section above for more details.
The Publish Imported Categories option will publish categories to the Online Store sales channel.
Viewing Import Status
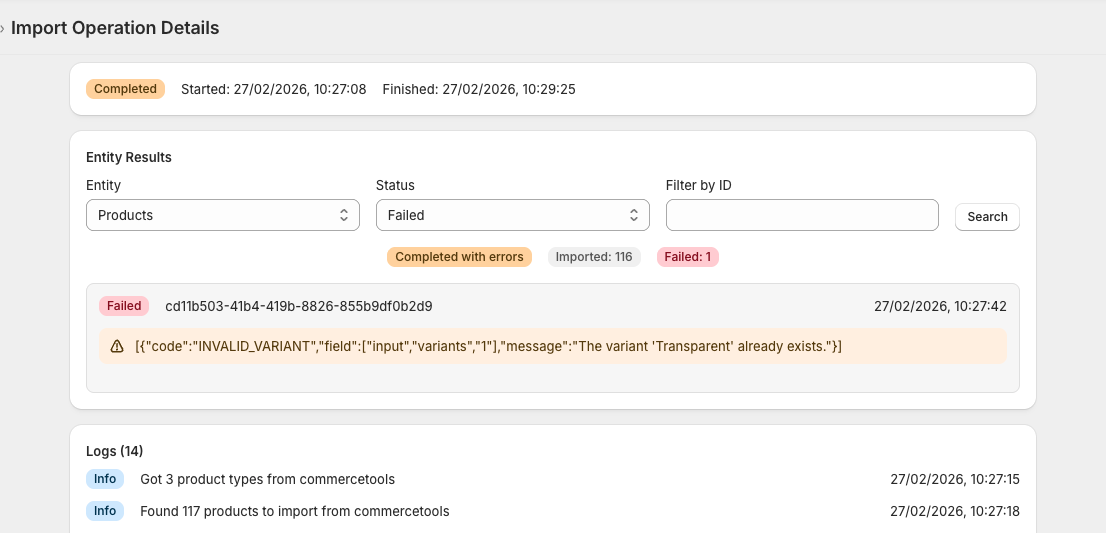
A status page is available for each import which shows the progress and results of the import. You can view the status page by clicking on an import from the Import Operations list. Below is an example screenshot of the status page.

Each import shows results per product/category, filterable by status and searchable by commercetools ID.
- Success - Imported successfully
- Failed - Import failed (see error message)
- Partial - Created/updated but a follow-up step failed (e.g. publishing)
Errors
If the mapping is invalid, the Shopify GraphQL API will return an error. This error is shown on the status page of an import. Below is an example of an error shown on the status page.
Troubleshooting
Mapping Errors
Most errors you will run into are issues mapping to the Shopify API. You will see details of the error in the status page of an import. Some common issues are listed below. The logs specify the bulk operation file URLs so you can review the data being sent to Shopify for debugging.
Duplicate Product Options
If you have multiple variants with the same value for an attribute that is being mapped to product options, then you will get an error from Shopify as options have to be unique. E.g.
{"code":"INVALID_VARIANT","field":["input","variants","1"],"message":"The variant 'White' already exists."}
You need to provide a valid list of attributes in the Variant Attributes for Options section to ensure uniqueness. E.g. in the error above, we add an additional size attribute to the Variant Attributes for Options list to ensure the option values are unique (e.g. White / Small and White / Medium instead of just White).
Invalid Mapping Configuration
If you map to a field that doesn't exist in the Shopify API, you will get an error like below. Check the Shopify API documentation for the mutation you are using to see the available fields.
{"code":null,"type":"GraphApi::BulkMutationUserError","field":["query"],"message":"Variable $productSet of type ProductSetInput! was provided invalid value for invalid-field (Field is not defined on ProductSetInput)","extra_info":null}
Bulk Operation file sizes
Shopify limits the size of bulk operation files (see https://shopify.dev/docs/api/usage/bulk-operations/imports). If you run into issues with this, the number of products/categories included in each file can be altered in Settings - General - Advanced section.